Contents
- 0 Overview
- 1 Accessing the Workshop
- 2 How the Workshop works
- 2.1 Events
- 2.2 Conditions
- 2.3 Actions
- 2.4 Values
- 2.5 Contextual values
- 3 Making a basic mode
- 4 Saving Workshop modes
- 4.1 Saving to a preset
- 4.2 Saving to a code
- 4.3 Saving to text
- 5 Limitations of the Workshop
Overview
This is a basic guide on how to use the Overwatch Workshop and a run-down on how it works. This is intended for newcomers to the Overwatch Workshop who may not have programming experience. It doesn't go over eveything, but it explains the fundamentals of the Workshop and how it works.
Accessing the Workshop
The Overwatch Workshop is a way to give custom games custom rules and behaviours. To create a Workshop mode, you need to create a custom game lobby where you can build your workshop mode.
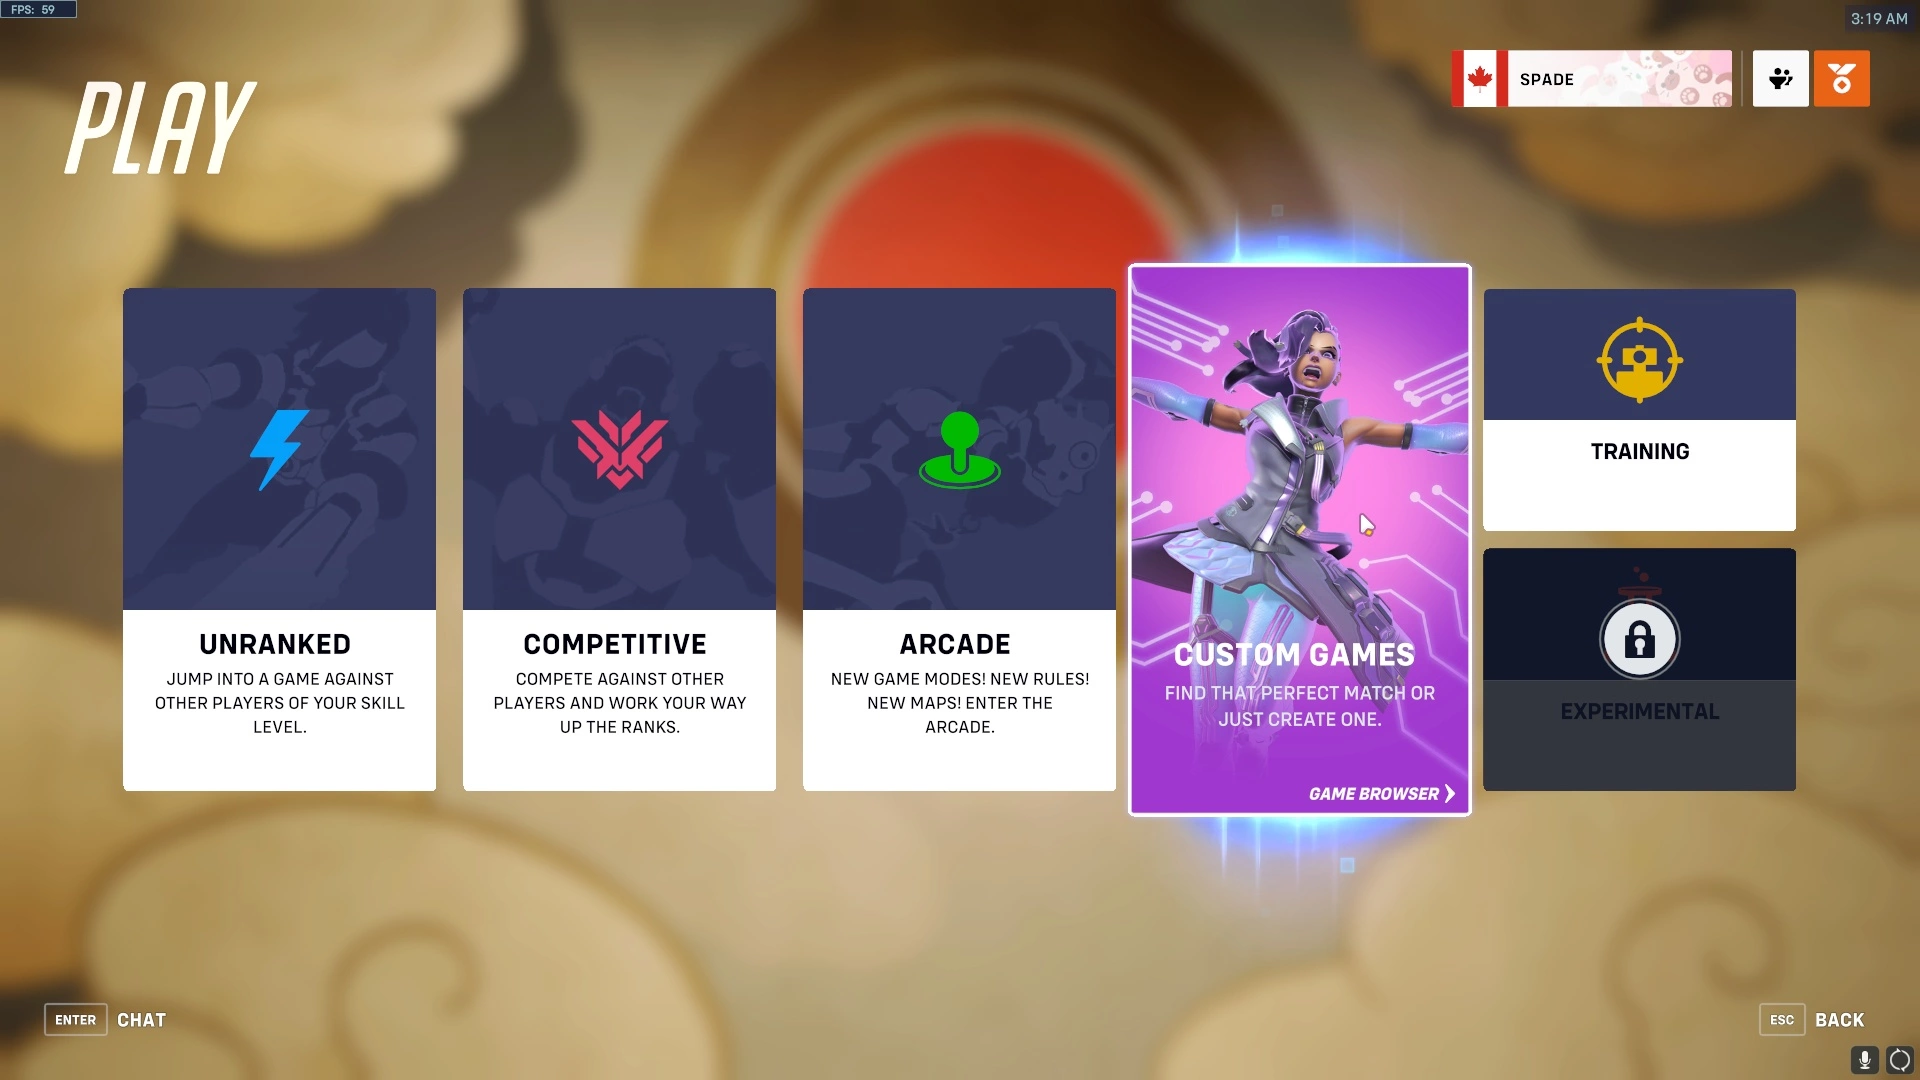
To make a custom game lobby, click on the Custom Games card.
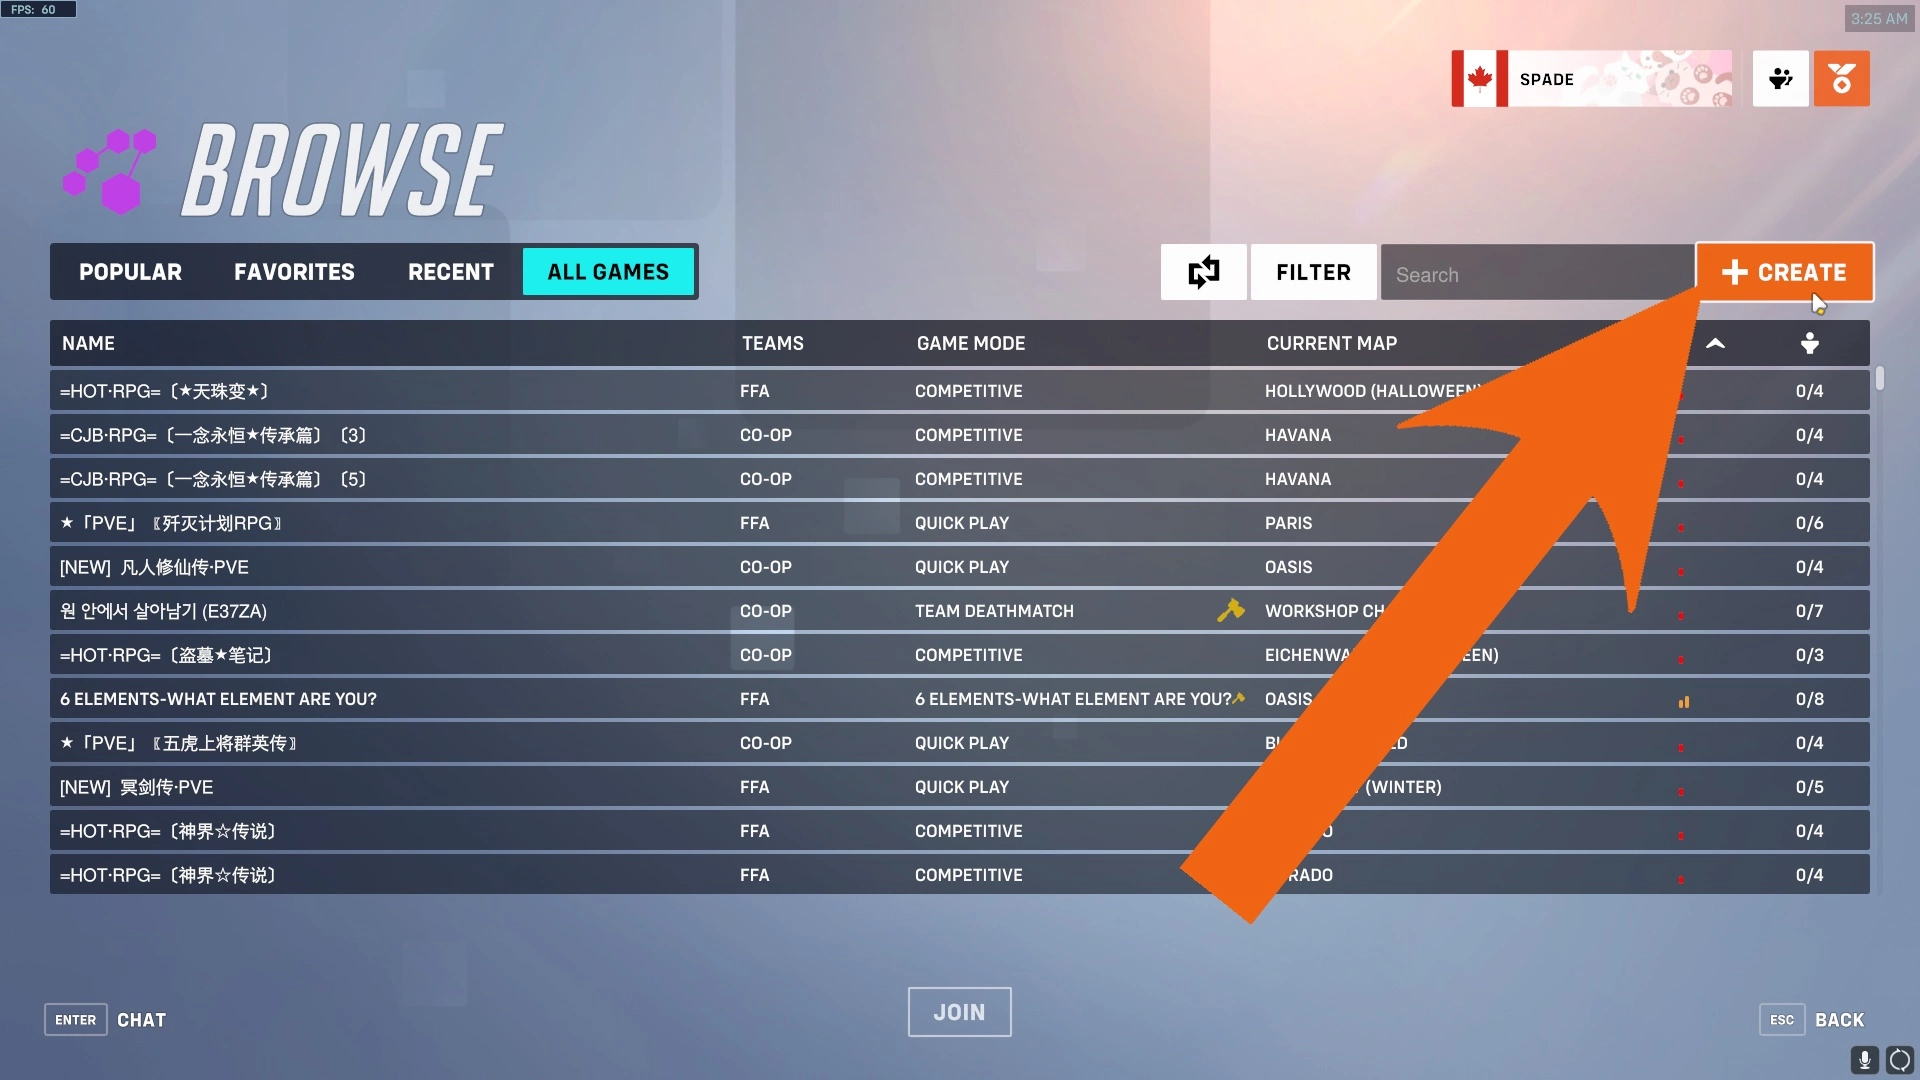
Click on the Create button to make a new lobby.
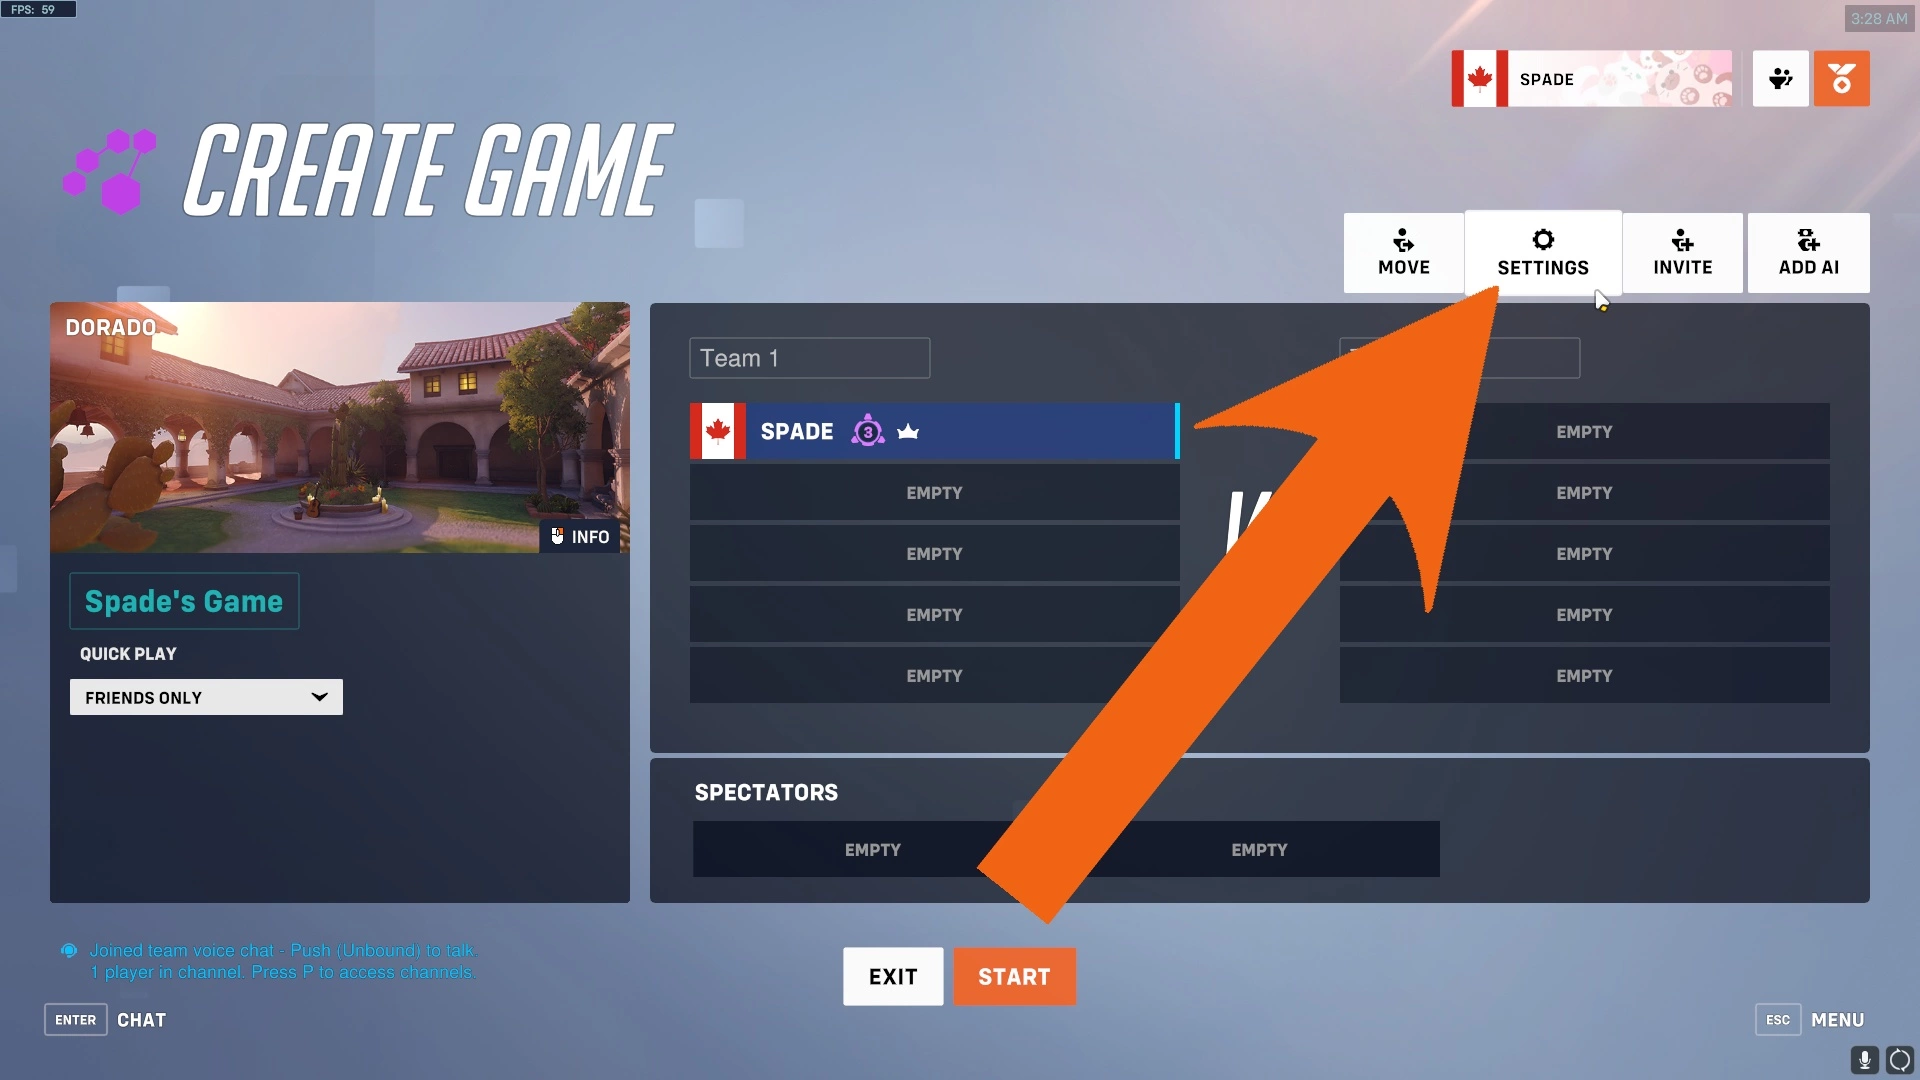
Here, you can manage the game lobby and open the settings.
To open the Workshop for this mode, open the lobby settings.
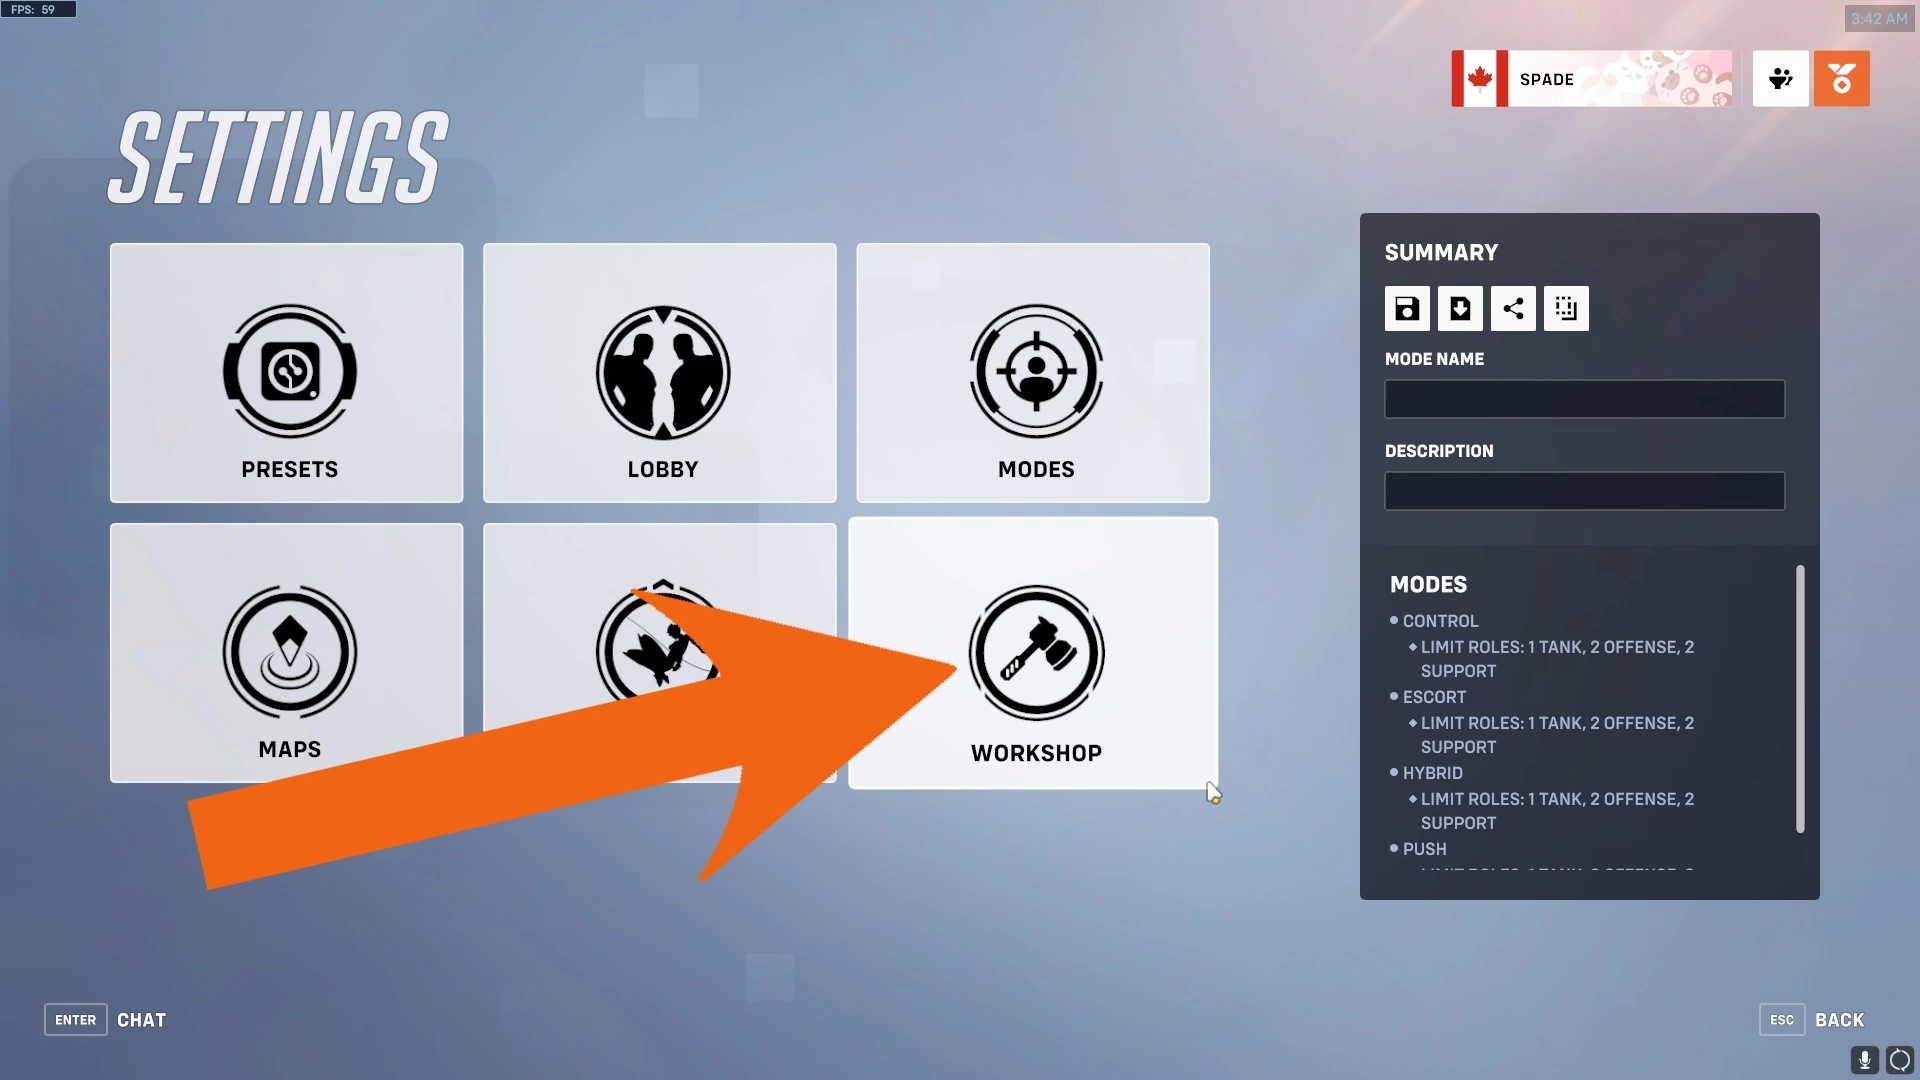
Click on Workshop.
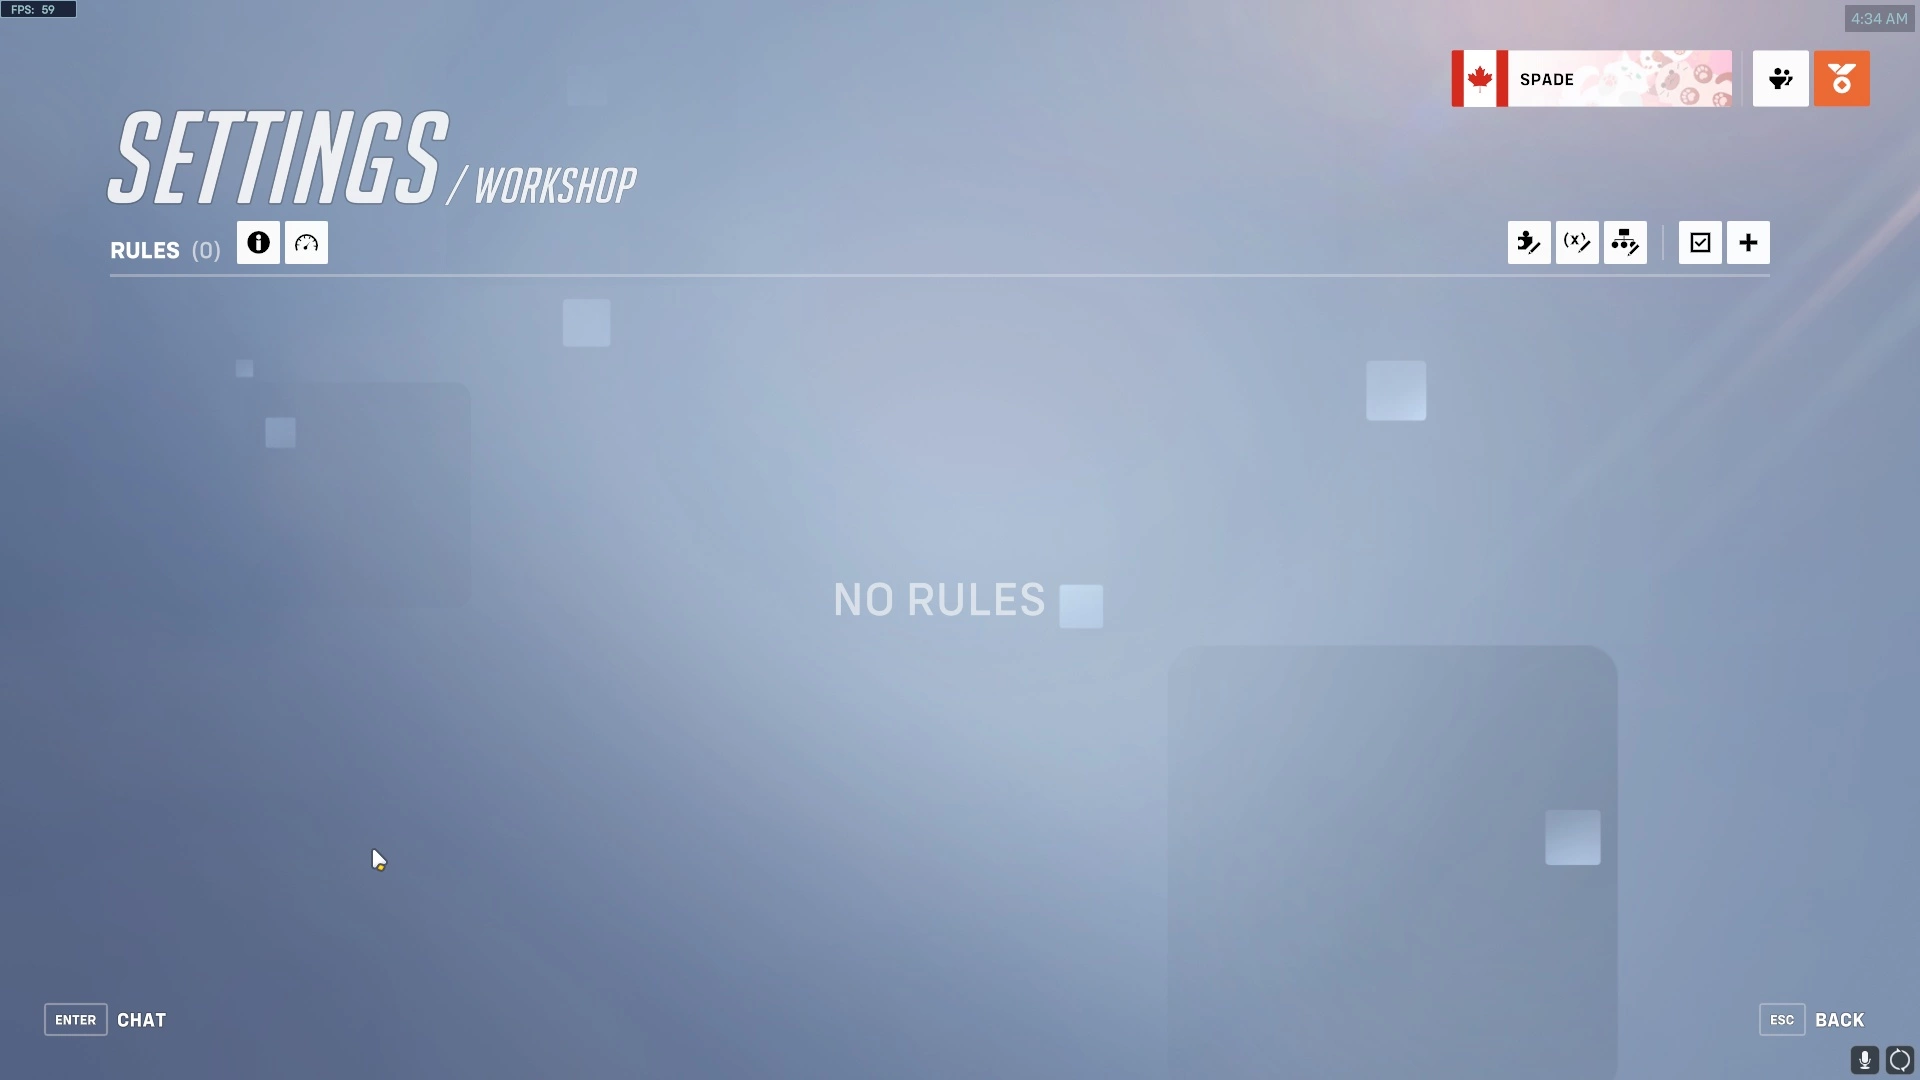
The Workshop should start empty, like this, unless you loaded a preset with Workshop rules.
How the Workshop works
Workshop modes are made up of rules. Rules have an event, some conditions and some actions. When a rule's event happens and all of the conditions for the rule are met, then the actions will be run from top to bottom.
Events
All rules have events. When the event happens, the rule will "try to happen". That is, it will check all the conditions. If they are all met, then the rule will do all of the actions in top down order. A list of all events can be found here.
Conditions
Conditions compare two values. If the comparison is correct, then the condition is met. For example, the condition Custom String("Hello") == Custom String("hello") is wrong, so it is not met. Custom Strings are just text values, and since the two text values are different (comparison is case sensitive), the condition is not met. The condition that (2 + 1) > 2 is correct, so it would be met.
Another example: this condition is met when the player is moving, so rules that have this condition cannot run the actions if the player is not moving.
A rule needs all of its conditions to be met for its actions to be run. You can check the Compare value wiki page to find which comparisons mean what.
Actions
An action does something in the game. They can do things like changing a player's move speed, creating things like effects, texts or bots, waiting, skipping another action or looping another set of actions, and many other things.
Most actions need some values to be provided. For example, setting the match time needs you to tell it what to set the match time to; it needs a number. This wiki has a comprehensive and usually up-to-date list of actions, what they do and what values they need as well as their types. There are also some deeper guides on this wiki that clarify how to use actions or show unique and interesting ways to use them.
Values
Values are information about the game or just information in general that are used by conditions and actions. Some examples are:
- the number 25
- the payload's progress in the game
- a player, such as the host player
- text values (a string or custom string)
- a list of other values (an array)
Or many other examples.
Values have different types. You should pay attention to types to make sure your code makes sense. For example, it doesn't make sense to set the match time to "Hello" seconds, it doesn't make sense to kill the number 200, nor to check if a position is greater than a number. You should try to make sure the types of the values you use make sense where you use them.
You can check the wiki page for values to find info on specific values and their types.
Contextual values
This is an example rule that will try to happen whenever any player dies. If the player is using their ultimate when they die, a small message will be displayed, then, after 1 second, they will be removed from the game.
In that example, Event Player refers to the player who died to trigger the event. This value is special, because it depends on the context of the rule. It refers to two different players when two different players die.
For example, if player xX_T500_Pro_Genji_Xx dies while using their ult, then in that instance of the rule, Event Player refers to xX_T500_Pro_Genji_Xx. In that instance of the rule, the conditions are checked, the rule sees that the Event Player, which is xX_T500_Pro_Genji_Xx in this instance is using their ult. This means the actions are run; a small message is displayed, one second passes and then xX_T500_Pro_Genji_Xx is kicked from the game.
If another player, superteamfortress dies but isn't using their ult, the rule will try to run, in a different instance with its Event Player being superteamfortress. It will then see that its Event Player (superteamfortress) is not using their ult and it will not run its actions.
There are more examples; in a Player Received Healing event, Healer and Healee refer to the player who healed and a player who got healed, in that order. In a Player Died event, there are Attacker and Victim which refer to the player who killed the victim, and the player who got killed by the attacker, respectively.
You can check the wiki page for the event for the contextual values based on that event.
There is 1 value that acts like a contextual value but doesn't depend on events. It is called Local Player. It can only be used in created effects and visuals since it refers to the player that is looking at the effect. A page for Local Player can be found on this wiki.
Making a basic mode
idk lol go search on tick-tock or something
Saving Workshop modes
There are three ways to save Workshop modes for later. These are saving it to a preset which can be loaded, exporting it to a code which can be imported or copying the whole mode's text and saving it on your computer as a text file or on this website.
Saving to a preset
Saving the mode to a preset is the least advisable of the three, but is convenient and easy.
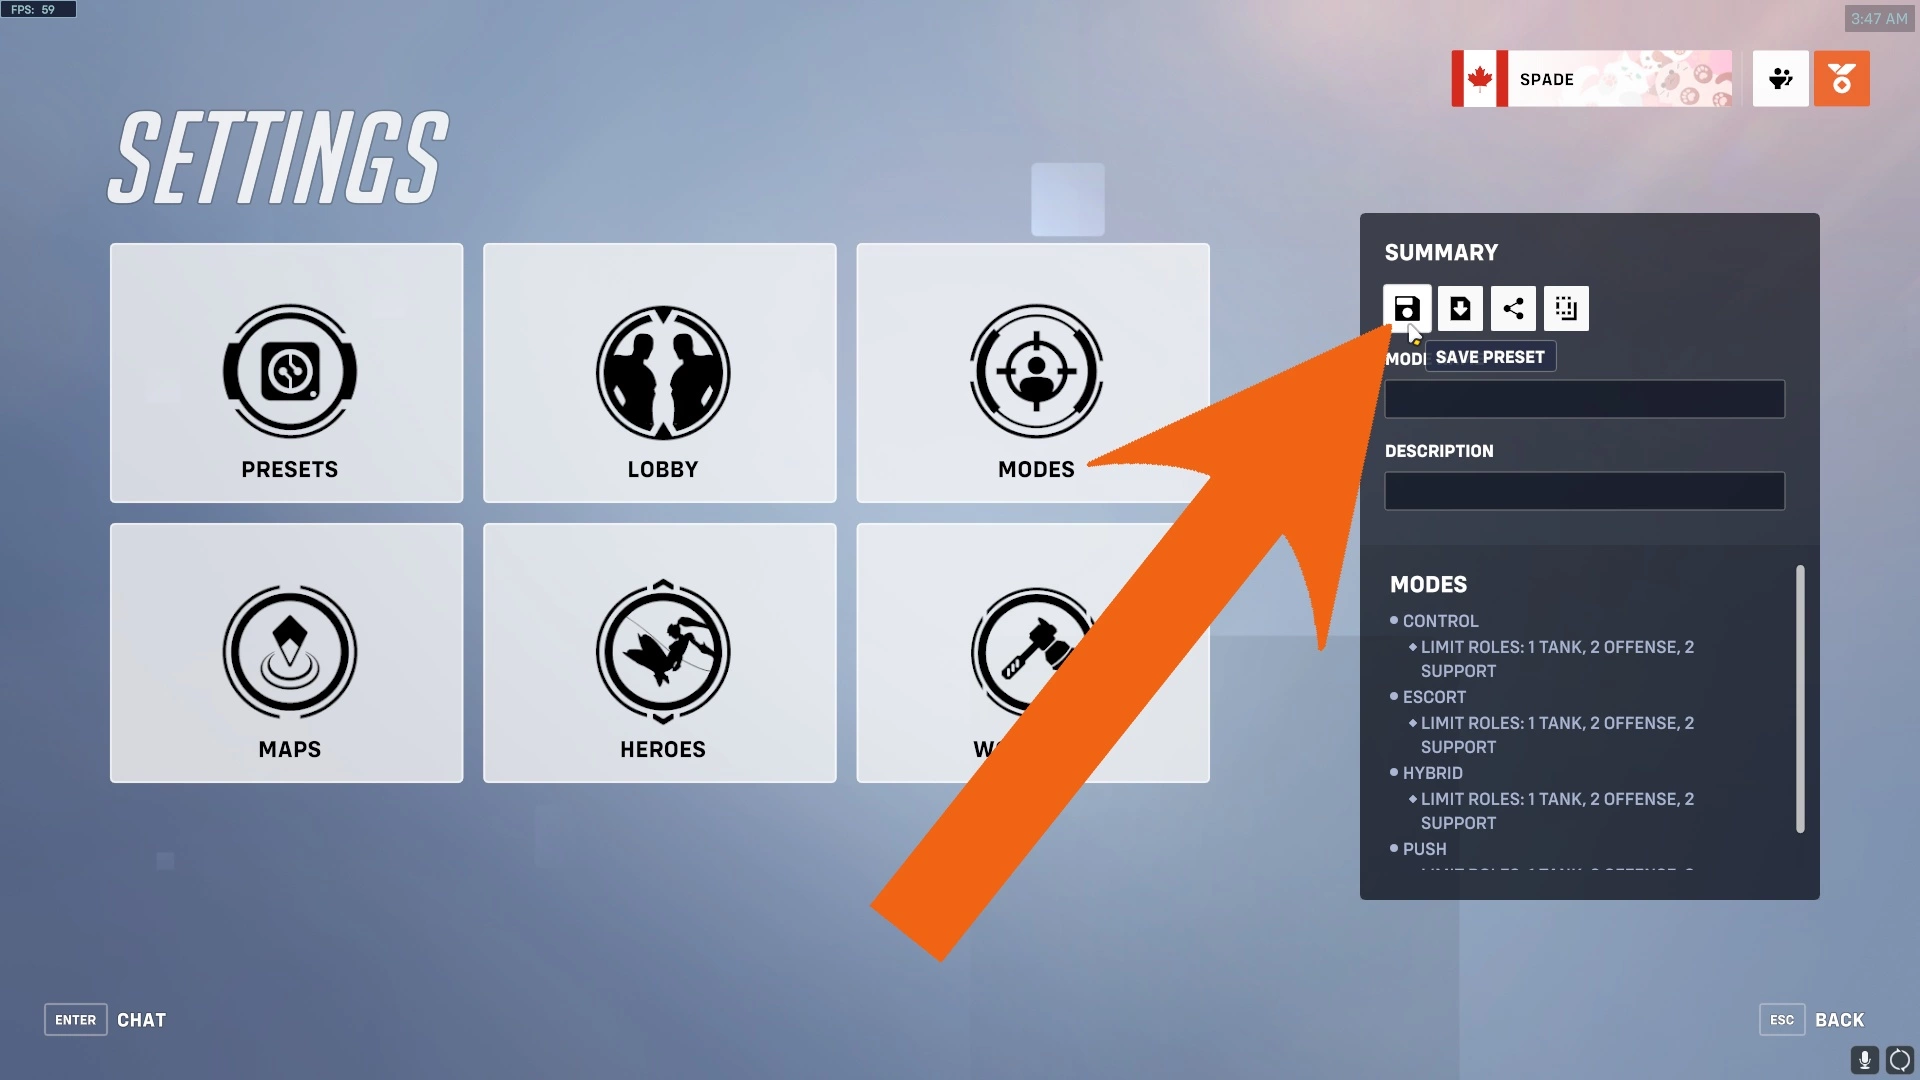
Press the Save Preset button here, and enter the name for the preset.
Saving to a preset can be a bad idea since it is easy to overwrite presets containing your gamemode, at which point that mode is permanently lost if you did not save it elsewhere. Also, the amount of presets is limited, so if you have a lot of gamemodes, you will have to start overwriting old ones.
Saving to a code
A code is a 5-6 letter code that can be used to import a mode. Saving the mode to a code requires that you keep a copy of that gamemode code somewhere, so you can import it later.
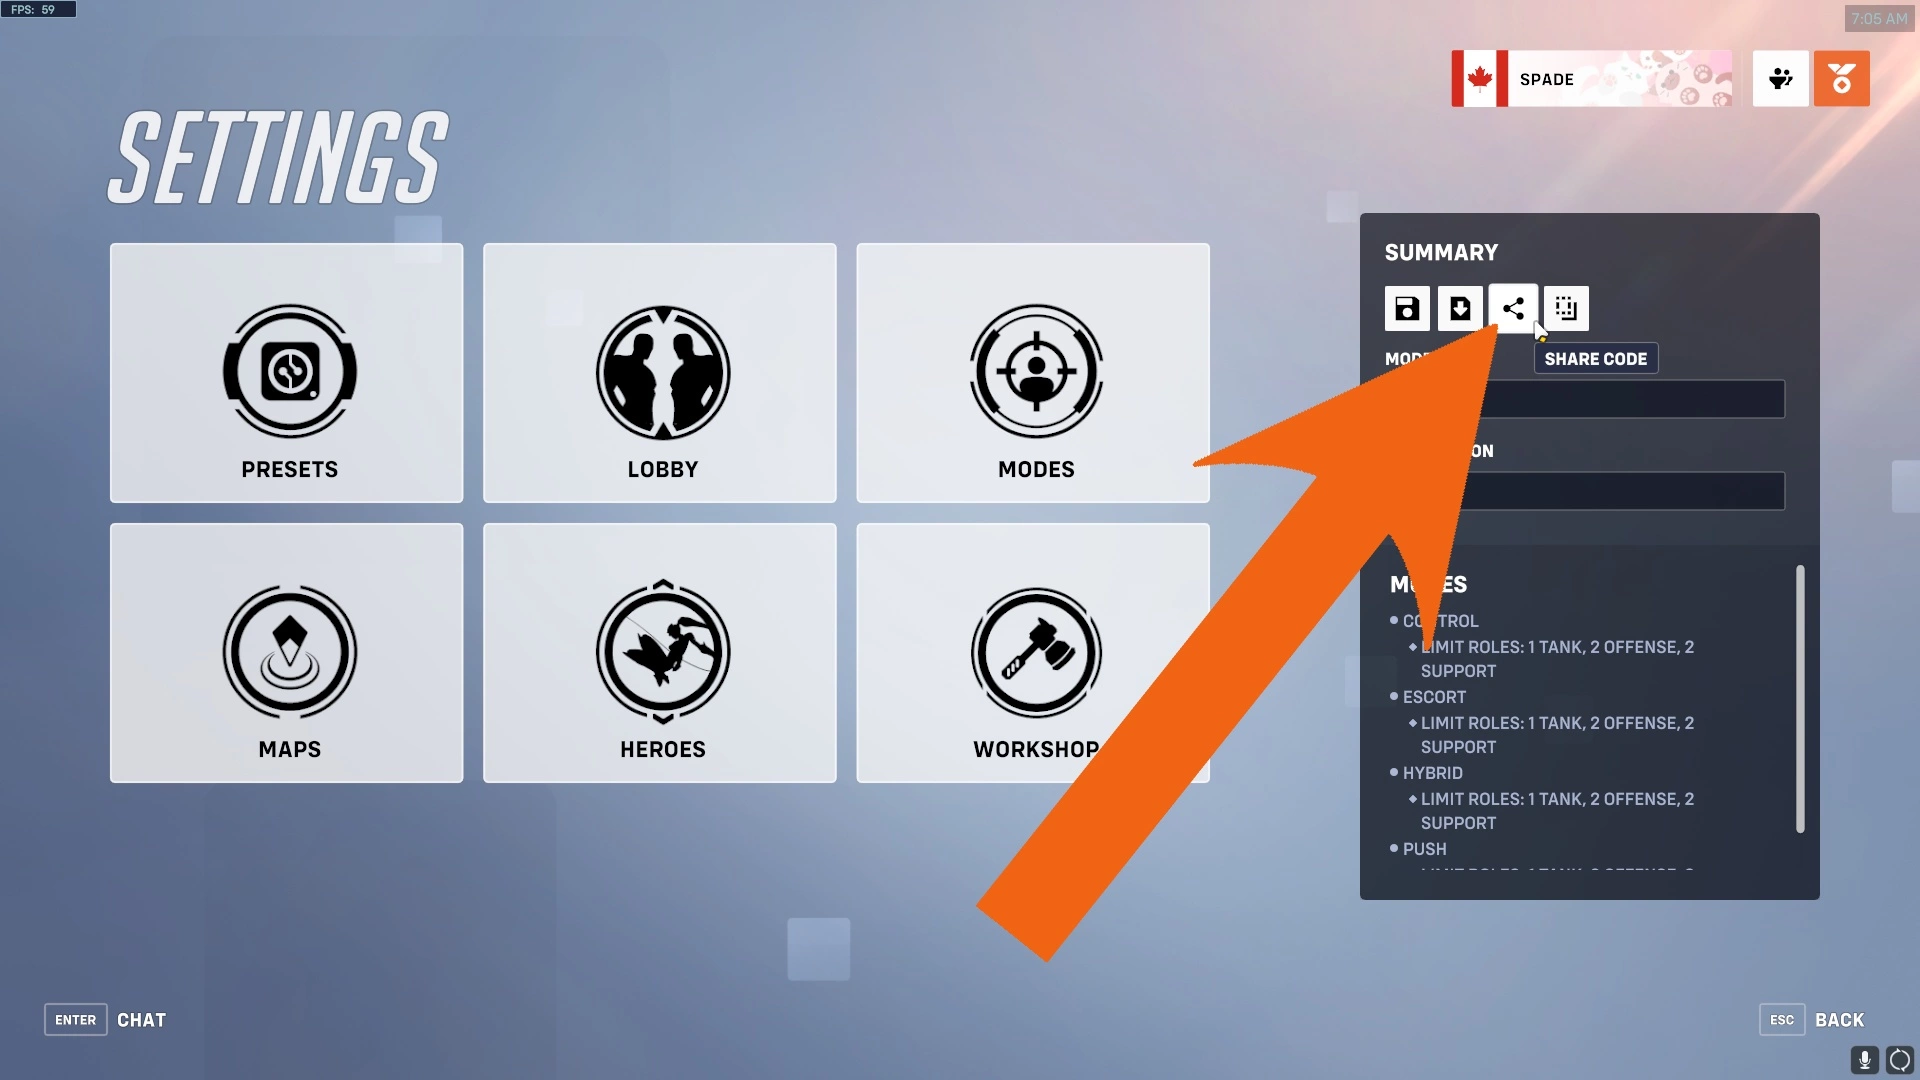
Press the Share Code button to create a new code or update an existing one. To generate a new code, change the dropdown in the popup to CREATE A NEW CODE. To update an existing code with your current lobby's settings, change it to UPLOAD TO EXISTING CODE and enter the code.
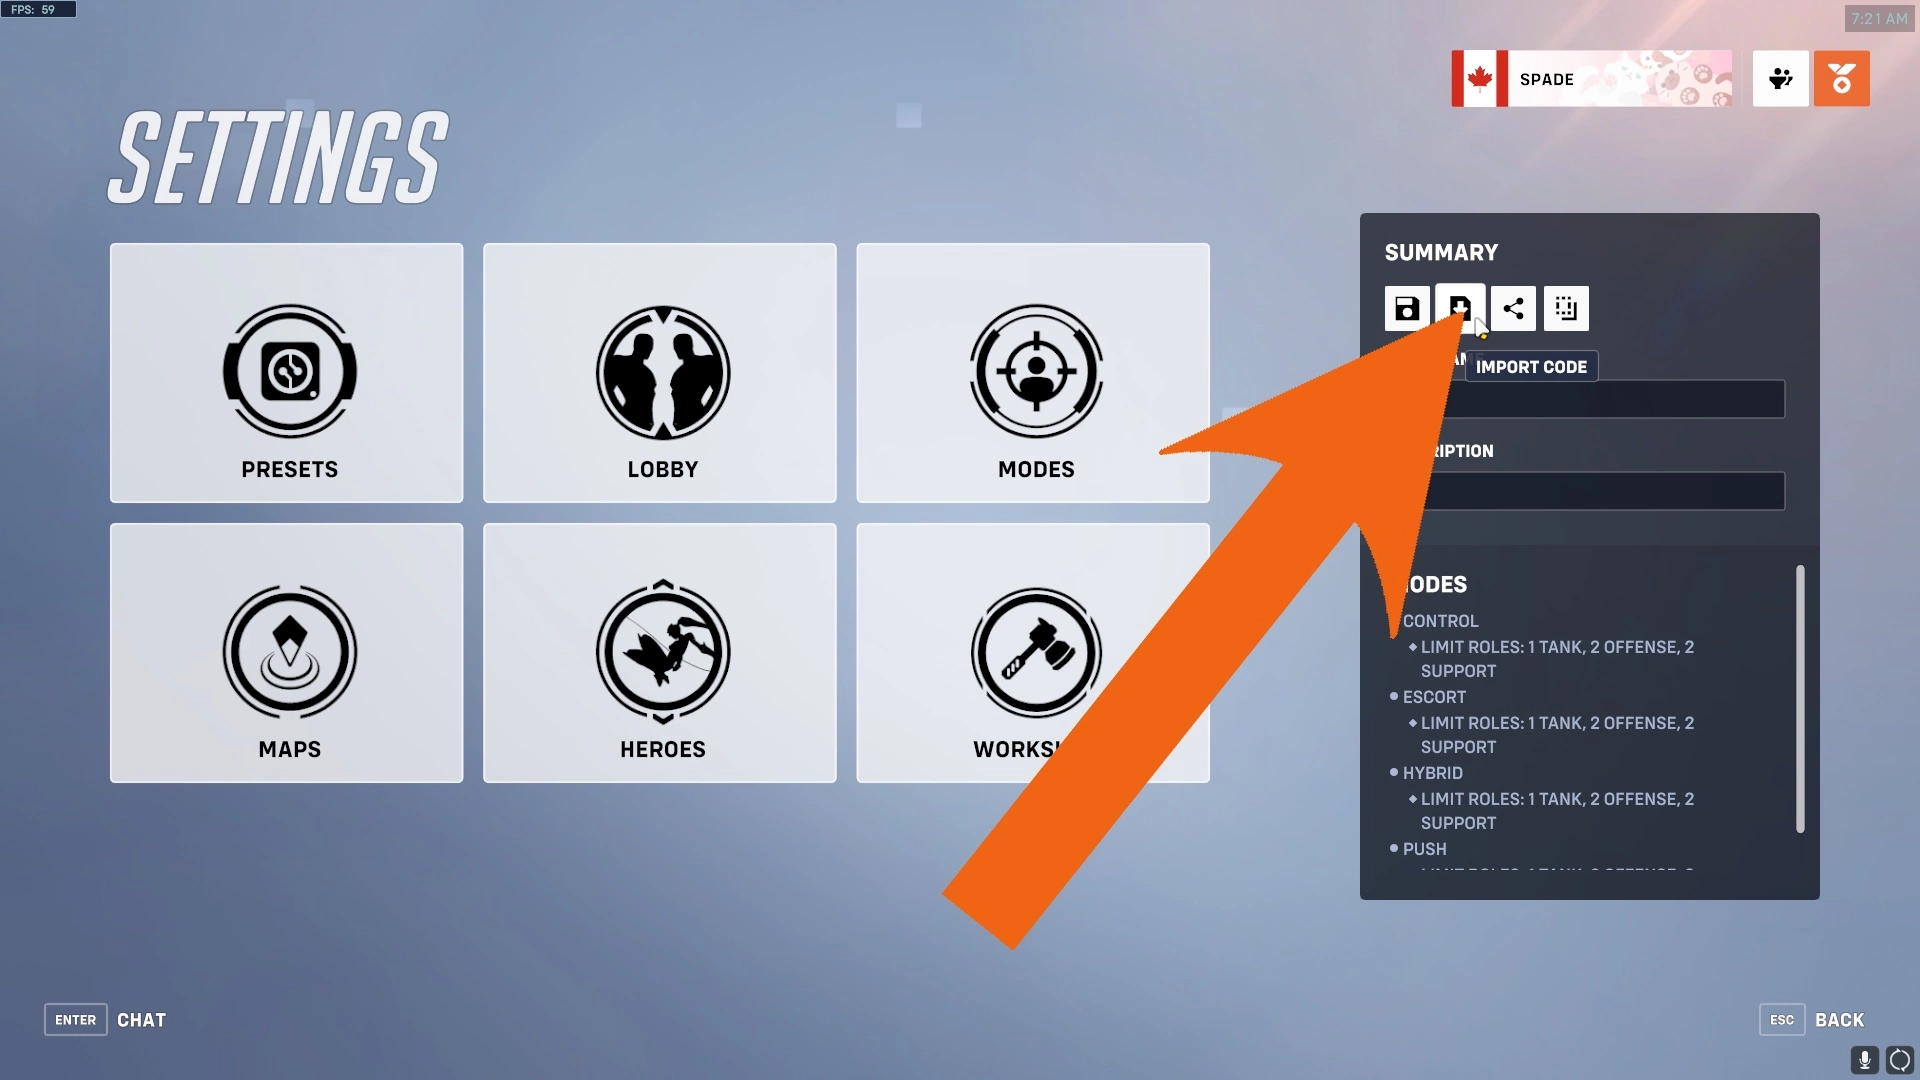
To load a code, press the Import Code button. Enter the code to import it.
Uploading to the existing code overwrites the contents in that code to your current lobby's settings, permanently erasing what was once on the code. To prevent accidentally overwriting your other modes, it is advisable to put the code in the mode's description or name. Then, to update the mode, simply copy the code in the description and upload to that code.
You will need to keep a list outside of Overwatch of the codes that contain your saved modes, since there is no way to get the list of codes that you have ownership of from Overwatch. Codes expire, deleting the mode associated with the code, unless it is imported or uploaded to enough times, making it immortal. This is usually not a problem if you use the code enough in 6 months, but this is not a bulletproof solution to saving your modes either. However, it is relatively easy and convenient and lets you share your mode with others easily.
Codes can be shared on this website, by creating a code, then making a post with that code. The text form can be saved in that post alongside the code, in the code snippet section of the post.
Saving to text
Copying the mode's settings will copy all of the mode's settings, including the Workshop settings and rules. You can then paste this to a text file to save it and copy the contents of the file to your clipboard to paste it into a lobby to load the mode.
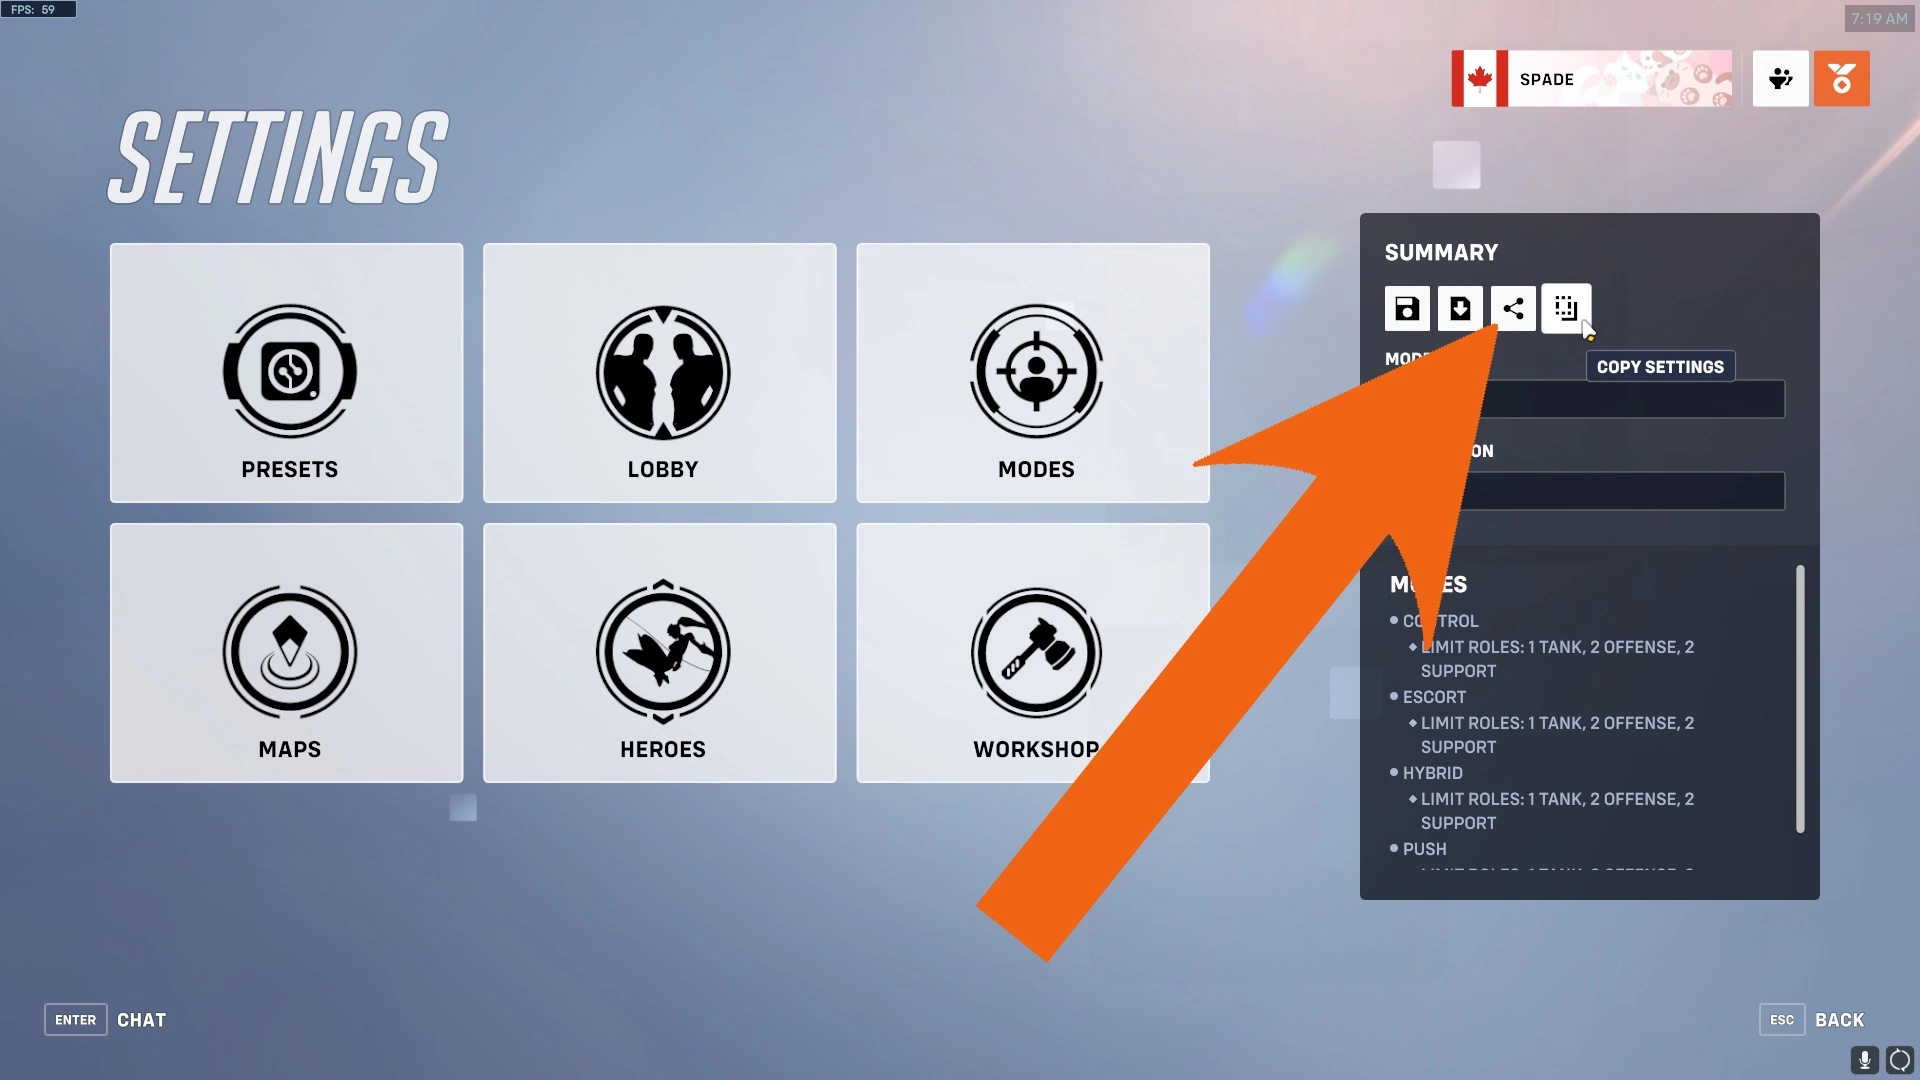
Press the Copy Settings button to copy all of the mode's settings to your clipboard. Paste this into Notepad or your text editor of choice to save it as a text file.
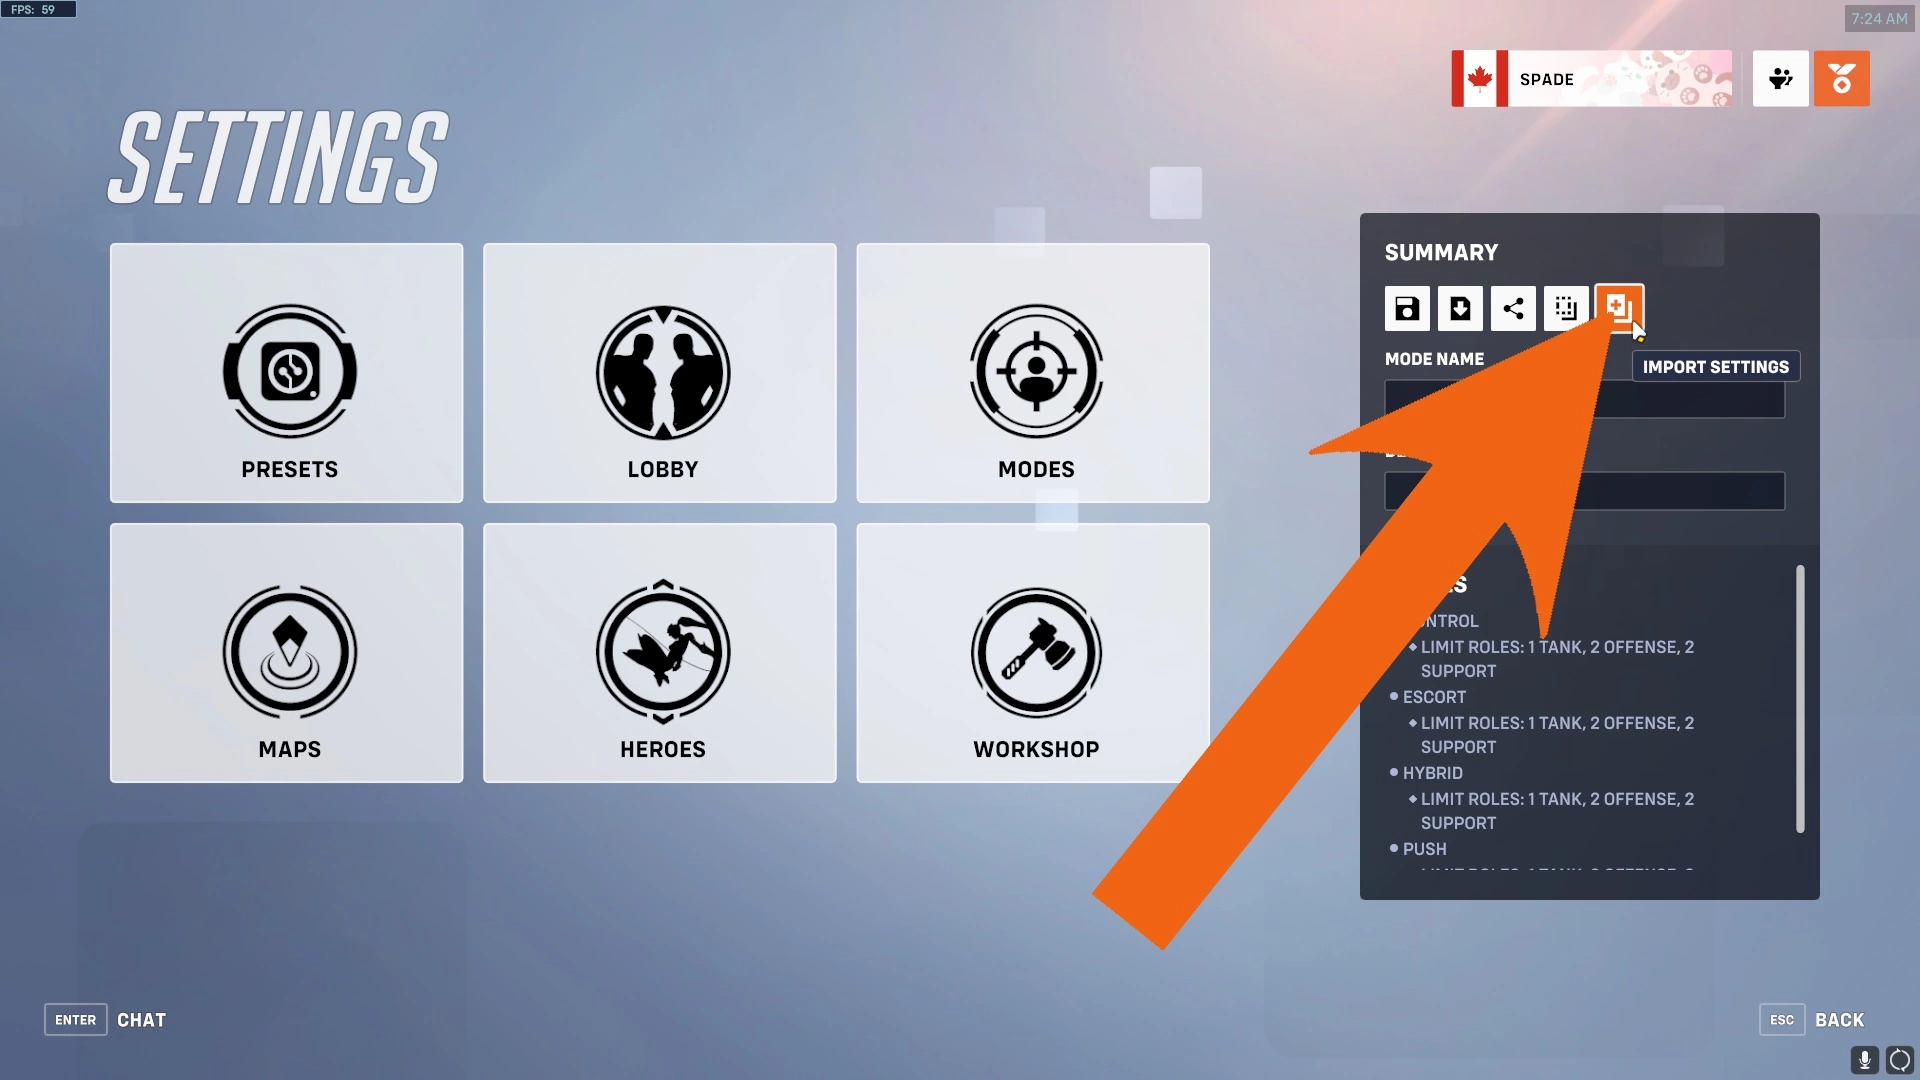
After copying a mode's settings, the Import Settings button appears. Clicking it enters the settings on your clipboard to the lobby.
Since console players cannot paste the settings to a file or upload them to this website, they cannot use this method to permanently save modes. PC players can do so, meaning this is the best way to save modes for them. If you don't want to save and organize files, you can upload the settings on this website, along with the share code for the mode. You can also make posts that are unlisted or private if you don't want to share them.
You can also paste and copy rules, conditions and actions as text. This can be useful for editing the order of arguments, or copying values from one place to another, which can't be done easily in the Workshop editor.
This is how HLLs - high level languages can create modes without you having to open the Workshop editor. The mode is created through text instead of through Overwatch, then converted to the text form to be pasted into a lobby.
Limitations of the Workshop
The two biggest limitations of the Workshop are features and server load. Since players can only use actions, values and events provided to them, Workshop modes are limited to only the features provided by the Overwatch developers. This can make some things that seem simple incredibly difficult to do in the Workshop, such as tracking where Junkrat's Riptire is, or making a character shoot faster. These are subject to change if such features are added to the Workshop in the future.
The second major limitation of the Workshop is the server load limitation. When a lobby is using too many server resources, it will stop the game in the lobby. This is to make sure custom games don't overwhelm Overwatch's servers. The problem is that this limits the complexity of Overwatch modes, making some ideas for modes infeasible.
Other limitations are also in place to keep clients or servers from getting overwhelmed, such as the extension system and the maximum amount of players, bots, texts and effects. These are the maximums:
- The maximum amount of players and bots combined is 12, which can be raised to 24 using an extension. However, there cannot be more than 12 real players. This does not include training bots but does include AI bots.
- The maximum number of texts is 128. This cannot be increased. Texts include in-world texts and HUD texts and their progress bar counterparts.
- The maximum number of effects is 128. This can be increased to 256 with an extension. Effects include effects, beam effects, icons and Workshop created projectiles.
