EVOLVE - Climb to the top of the foodchain!
This code is over 6 months old. The code may have expired and might no longer function.
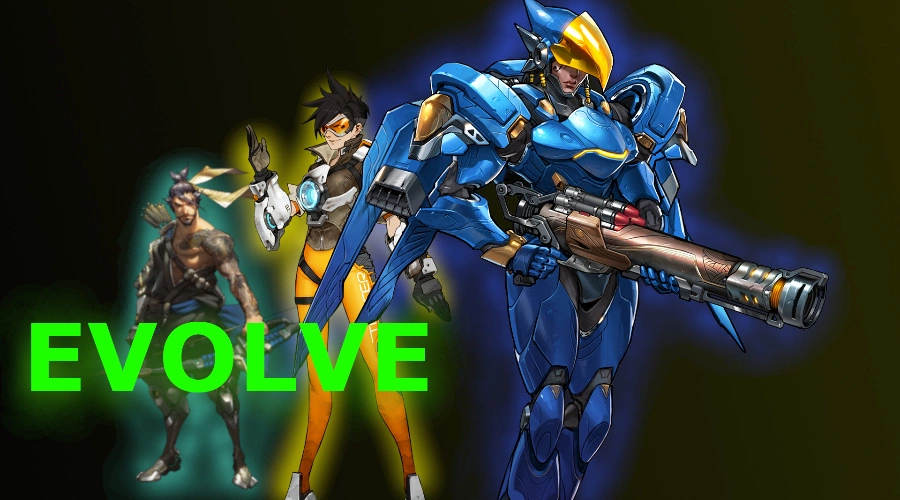
At the start of every match all players are warped to the initial class selecter, where each player can decide between three classes to start of with. These are D.va (bunny), the most mobile but fragile option of the three (it should be said that she spawns without mech), Hanzo (hunter) wich has mediocre movement and hp but high damage (for the early game), and Roadhog (hog) wich excels in close range combat. To select a class you must press interact (normally F) while standing in the circle belonging to the desired hero.
In this mode, using your resources in the best way possible is crucial to reaching the highest level. Levels are gained by gaining exp, and exp is gained in three (four) ways:
Dealing damage (currently 50% of damage dealt turns into exp)
Earning assists (currently 45 exp for each elimination, does not require a final blow)
Final blows (currently 40 exp + 20 * level difference between you and the victim)
Blood crystals (buildings that are located near both spawns, wich require a certain amount of blood to grant a EXP reward of 150. This reward increases everytime the crystal respawns. It should also be said that blood crystals will never kill you)
Joining-mid game (when you join mid game, you are given the a bit below average level of all players)
When you gain a level, you also get one upgrade point. Upgrade points can be spend by using the shop. The shop is activated by holding down the interact button (f) and crouch, and upgrades are bought aiming between four randomly generated options. These options are:
| Upgrade tree 1 (1 point) | Upgrade tree 2 (1 point) | Upgrade tree 3 (2 points) | Upgrade tree 4 (2 points) |
|---|---|---|---|
| +5% max health, +5% damage dealt, +5% movement speed | +5% projectile speed, +5% healing dealt, +5% damage resistance | +5% lifesteal, +5% tenacity (gives +2.5% max health, X% damage you take is healed and you grow in size) , +2.5 health regen/sec | +10% crit chance, +5 on-hit damage, +5% resistance shred (shreds damage resistance stat) |
Every eight level (right now level eight and sixteen and twentyfour) you are also able to select a new class in the class shop. To enter the class shop, you must travel to either one of the spawns and enter one of the class shop entry's (visualized by an orange cloud, it's hard to miss). When you've entered the shop, you select a new class the same way as at the start of the game. Both the seventh and fourteenth level allow you to select one out of two classes- these two classes are predetermined based on wich class you are at the moment. Here is a list of all current classes:
Bunny (D.va) (choosable at the start of each match or when joined mid-game) Quick and evasive but fragile. Usefull information:
- Spawns without mech and can't generate a new one
- Has a custom ability on her shift, bunny hop, wich boosts you in the direction you're walking in
Hunter (Hanzo) (choosable at the start of each match or when joined mid-game) Mediocre survivability and movement speed but high damage. Usefull information:
- Doesn't have ultimate, double jump, ability 1 or ability 2
- Does have a custom ability 1, focus, wich doubles the damage on your next attack that connects, and if no damage dealt, for six seconds.
- Is able to one-shot Bunny's (if they don't have high tanky stats of course) with a fully charged headshot or bodyshot with focus active.
Hog (Roadhog) (choosable at the start of each match or when joined mid-game) Excels at close range combat. Usefull information:
- Doesn't have ultimate, secondairy fire or ability 1
- Ability 2 doesn't heal you that much due to Hog's low healing dealt base-stat, but it does absorb a part of the damage taken while using it, wich will be aplied as additional damage with your next attack hit.
- Even though you have the highest survivability of all starting classes, your lack of range, mobility and having a big hitbox makes you an easy target in open area's
- Can make good use of the blood crystal with some upgrades to his survivability.
Flash (Tracer) (Choosable at level 8 and only by Bunny) Everything the Bunny does, but better. Usefull information:
- Doesn't have ultimate or ability 2
- As a hero who attacks often and with a high crit cooldown, it's better to build on-hit then crit chance.
Thief (Sombra) (Choosable at level 8 and only by Bunny or Hunter) Steal stats from your oponents. Usefull information:
- Doesn't have ultimate or ability 1
- As a hero who attacks often and with a high crit cooldown, it's better to build on-hit then crit chance.
- Your hack has a custom passive, kleptomancer's grasp, wich grants you 50% of all upgrades on any enemy you've hacked. With this passive, Sombra is never truly behind.
Phantom (Reaper) (Choosable at level 8 and only by Hog or Hunter) Haunts enemies who dare to attack him. Usefull information:
- Doesn't have ultimate, ability 1 or ability 2
- Has a custom ability 1, The Haunting, wich is activated upon the Phantom taking damage, and instantly teleports him to the attacker.
- Upgrading healing dealt as reaper essentially upgrades life steal but only for 1 upgrade point. Don't forget that this is due to his in-game passive however, and doesn't cary over to other classes.
Ranger (McCree) (Choosable at level 8 and only by Hunter) Flexible damage dealer that excells at putting squishies in the trash can. Usefull information:
- Doesn't have ultimate
- Plays very well against mobility heroes due to him being able to shut down their main strenth with his flashbang.
Scientist (Winston) (Choosable at level 8 and only by Hog or Bunny) Zaps his enemies with pure science. Usefull information:
- Doesn't have ultimate or ability 2
- Winston can build crit to make his shift impact + melee combo deal huge damage, or build on-hit to get more consistent damage on his primary fire.
- Even though he has no self healing ability's, his high base max hp and mobility allows him to make good use of the blood crystal.
Golem (Orisa) (Choosable at level 8 and only by Hog) Nullifies her oponent's attacks with various means. Usefull information:
- Doesn't have ultimate, ability 2 and ability 1
- Your secondairy fire leaves a zone that completely removes the upgrades from any players inside (only while they're inside of course). This is really strong, since you will always be tankier and deal more dmg then people within the zone.
- Has a custom passive, Second wind, which heals you whenever you take dmg. The healing it gives gets multiplied up to 2 times, gaining 0.4 scaling per instance of taking dmg. This means you're better vs heroes who attack often.
Eagle (Pharah) (Choosable at level 16 and only by Flash, Scientist or Ranger) Uses the power of flight to locate and take down enemies. Usefull information:
- Doesn't have ultimate or ability 2
- Both hover jets and jump jet are less strong, so staying in the air is made impossible without using rocket jumps.
- If you have some hp regeneration or damage resistance, using rocket jumps can be a good option to stay in the air since you don't lose much hp.
- Has a passive that multiplies your movement speed and ads 15% extra damage when having an altitude of 1.25 meters or higher, so upgrading movespead grants super zoomies when mid-air.
Alchemist (Moira) (Choosable at level 16 and only by Flash, Phantom or Thief) Uses powerfull spells to take down enemies. Usefull information:
- Doesn't have ultimate, primary fire or healing orb on ability 2.
- Moira has a custom passive, Give and take, which causes you to take dmg upon using an ability. Due to this passive, you need to be able to heal yourself if you want to fully abuse her short cd's.
- Moira has another passive, Hemorrhage, wich deals 25 dmg to enemies at or under 50% max hp. This also heals you for the dmg dealt. Building crit makes this execute any squishy enemy, so on-hit isn't your only option for damage.
Witch (Ana) (Choosable at level 16 and only by Ranger, Thief or Golem) Uses utility and strong scaling to defeat enemies. Usefull information:
- Doesn't have ultimate.
- Ability 2 knocks you back if you hit yourself with it, and disables enemy's healing. Always decide when to hit yourself or your enemy, sice both have big impacts on a fight.
- Ana has low base dmg, but scales exceptionally well with either on-hit or crit.
- Since hp regenerative upgrades in this game are so strong, having the ability to shut them down with ability 2 is very strong.
Rat (Junkrat) (Choosable at level 16 and only by Ranger, Phanton or Scientist) Gives enemies an explosive surprise. Usefull information:
- Doesn't have ultimate or ability 2.
- Has a custom ability 2, surprise!, that turns you invisible 2 sec after activation. While invisible, you are granted a 10% move speed and 12.5% crit chance multiplier. Any enemy within 6 mtrs of you can see an effect at your position, and any damage dealt to you will make you visible, or whenever you use an ability. The multipliers last 0.75 sec after becoming visible again. Invis lasts for 15 sec.
- Due to the nature of his shift, Junk can easily hit mobility heroes and burst them. With his custom ability 2 he can also surprise them, granting them no time to react.
- Junk doesn't actually deal that much damage, so go Ana if you are against tanks.
Cryomancer (Mei) (Choosable at level 16 and only by Phantom, Scientist or thief) Uses the power of ice to fight. Usefull information:
- Doesn't have primary fire or ultimate
- Has a custom passive, cryohealing, wich instantly heals you for 30 hp (scaling with healing dealt stat) whenever you use an ability.
- Ability 1 doesn't heal that much over time due to her low healing dealt base-stat, but it does cleanse things like anti-heal from the Witch.
- Ability 1 combined with the blood crystal will heal you and blocks you from taking damage, while still giving you 50 exp per second. Combine this with her high max hp base stat and you have a completely broken combo.
- Has a custom passive, frozen domain, wich spawns a zone around you upon entering combat, that increases your healing dealt, multiplies dmg by 15% to anyone who's inside the zone and freeze enemies who try to enter or leavethe zone. Controlling when you enter combat and having good positioning is key to using this passive effectively.
- The zone dissapears after being out of combat for 4 seconds, and has a 10 sec cd. This means enemies can run away, and re-engage when your zone is down, so be aware of that.
Rumbler (Wrecking Ball) (Choosable at level 16 and only by Flash, Scientist or Golem) Knocks his enemies around while searching for tasty Hamstersnax. Usefull information:
- Doesn't have ability 2 or ultimate
- Has a custom passive, Hamstersnax, that spawns a snack at a random location on the map. Eating this snack grants you +30% dmg dealt and a 12.5% move speed multiplier for 30 sec and heals youfor 25 hp. If you don't eat a snack for 45 sec, you will lose 10% move speed. If you don't eat for another 30 sec, you will lose another 10% move speed and will take damage over time.
- Has another custom passive, Kinetic impact, that grants bonus dmg in his shift equal to his current movement speed (only horizontal speed is counted).
- Ball can built crit to oneshot squishy's with your right click into piledriver combo, or on-hit to shred tanks with your primary fire. Also has high enough base damage that building tanky is viable.
Marauder (Reinhardt) (Choosable at level 24 and only by Eagle, Alchemist, Cryomancer or Rumbler) Enhances himself by making blood-sacrifices to the old gods. Usefull information:
- Doesn't have secondairy fire or ultimate.
- His ability one goes much faster, but less far.
- Using abilities causes you to take 65 dmg over 2 sec, but they have really low cd's.
- Has a custom passive, Dark ascension, which grants bonus stats for 6 sec on his damage dealt/received and move/projectile speed when taking or dealing enough damage.
- While his ascension passive is active and you happen to reach 1 hp, enter berserk mode, which grants an even higher stat multiplier and invincibility untill your ascension runs out, after which you die. Due to this passive, rein can 1v1 players far beyond his level, if he can get inside close range while his passive is up.
- Has the highest base-stats of any character in the game, these stats also include unique upgrades like 5% damage resistance and 5% life steal.
Assasin (Genji) (Choosable at level 24 and only by Eagle, Alchemist, Rat or Witch) Uses advanced ninjutsu techniques to take down his enemies from behind. Usefull information:
- Doesn't have ability 2 or ultimate, and his wallclimb goes less far up.
- Has a custom passive, ninja, wich makes you deal 1.25 times the damage on a backstab.
- Has a custom ability 2, shadow attack, that creates a recall position you can recall to within 6 seconds. During this duration, have 50% less dmg, and when you recall heal for 50% of dmg taked during uptime of your recall. Also gives back any resource you've used during recall uptime (Lshift cd and ammo).
- When you have your recall up, try and bait enemies into not looking at you by dashing through them and recalling instantly. Upon recalling it will reset your cd for a quick follow-up.
- Due to his ability cutting your damage in half, you shouldn't hang on to it unless there are any importand abilities to dodge.
Automaton (Bastion) (Choosable at level 24 and only Rat, Witch, Cryomancer or Rumbler) Uses ancient technology to obliterate enemies. Usefull information:
- Doesn't have ultimate or secondary fire.
- Has a custom ability 2, scan, wich reveals all enemies and their classes in a 20 meter radius around you for 6 seconds.
- Has a custom passive, ancient core, which changes his Lshift ability depending on if your crit, on-hit or tenacity stat is higher then the other two. If his on-hit is highest you are granted his configuration: sentry (Lshift) and +10 on-hit (0.1 when taking scaling in account). If his crit is highest you are granted his configuration: tank (Q) and +10 crit chance. If his Tenacity is highest you are granted his configuration: assimilator (M2) and +10 tenacity. His secondary fire in this configuration grants bonus healing dealt and damage resist, and turns damage he receives into temporary on-hit damage.
- Due to his passive, bastion can be picked in any scenario, if he has the right stats.
It should also be said that when changing classes, any upgrades will be added onto the base-stats of the chosen class.
More importand aspects of this game are the in world-buildings and the fact that there are no healthpacks. There are currenlty two types of in world buildings: the bloodcrystals (wich have been explained already) and the healing well. The healing well is located in the center of the map, and heals anyone inside it's radius for 10 hp per second. This might not seem like much, but without healthpacks or teammates to heal you it's a crucial position in the map. There are also the two healing stones, located between the healing well and bloodcrystals. Thes healing stones will, upon pickup, instantly heal you for 20 health and then continue to heal you for 100 health over a 10 second period. When picked up, they will despawn, and respawn after 25 seconds.
Also, sorry for some bad spelling here and there, English is not my mother language and this was a very long text.
Snippet
Loading...